
In the Covid-19 era, everyone is doing more online meetings and classes. Every meeting platform that I have used (Webex, Discord, Zoom, Meet and Teams) supports basic voice and video chat plus one person sharing a screen or window on their computer with the other people in the meeting. This article will discuss some free or cheap options for doing a little more than the basics including having a camera on a small stage area where you can demonstrate handwork or show small items and mixing different sources unto the screen at the same time (picture in picture).
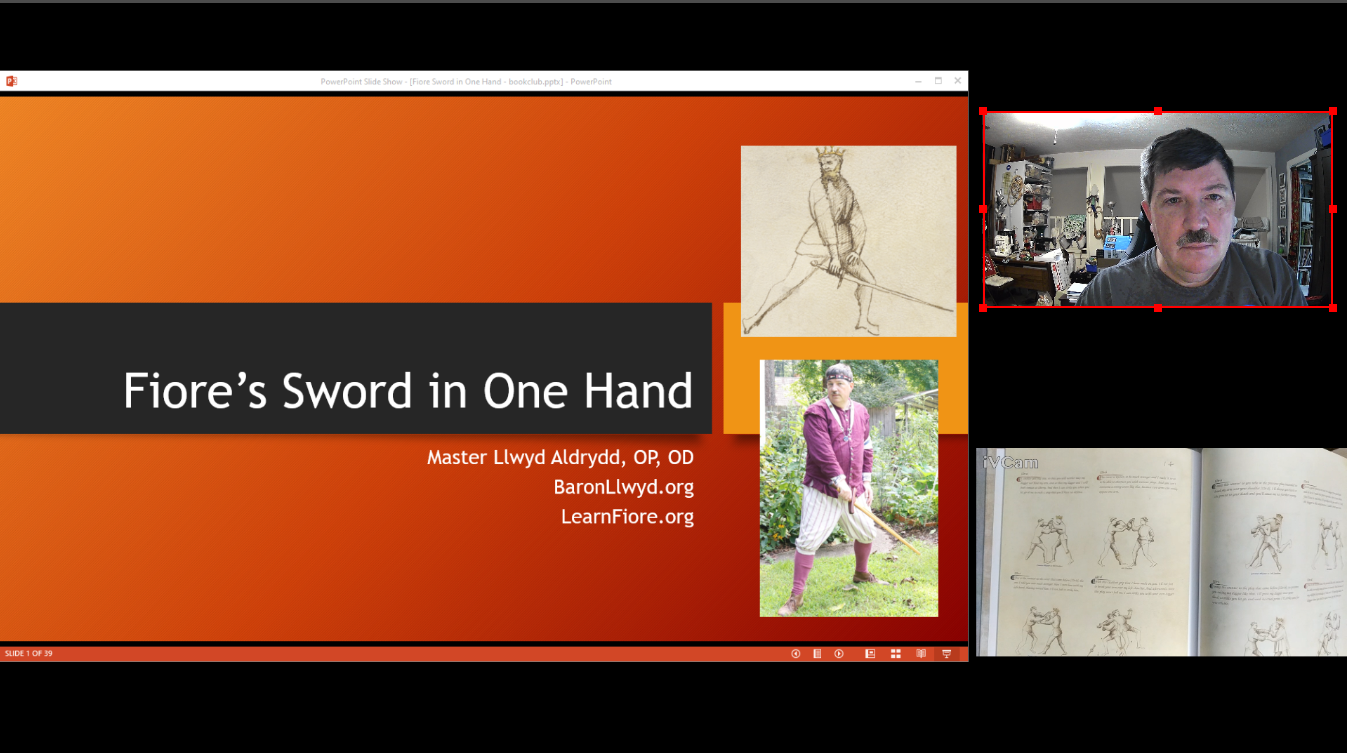
Presenting three windows at the same time: Powerpoint slides, webcam of the speaker, and a camera on the source document
The tools described in this article will pretend to be a webcam to your meeting software and should work with any platform. I have tested them with Google Meet and Discord so far.
This article is also available as a powerpoint presentation and as a recorded class on YouTube.
Step 1: Collecting Sources
Look around and see what cameras you have access to. Figure out if you can plug them into your computer. A built-in or USB webcam is perfect. A cellphone can work with some extra software. Other video cameras are also a possibility. For the set up described below we’re using a camera on the computer and a retired cellphone. But I can envision another camera or two having possible use (positioned over your shoulder, or focused on a wider space if you’re planning to demo dance or martial arts moves). I suggest starting small and growing as you gain confidence. A good cheap option is a no-name webcam off of Amazon as an additional camera that I have been pretty happy with and that I only paid $11 for: Webcam link. I also have a slightly more expensive Aukey model ($28) with a wider field of view that is set further back. I use the wider camera when I am demonstrating a sword move.
Most recent cellphones have excellent cameras. We have several retired Pixel XLs. They are no longer attached to cell service but work just fine in wifi mode. The first problem we addressed was getting a stable mounting system for the phone. You can certainly improvise something, but for $30 from Amazon we got the pictured adjustable mount that uses an old-school desk lamp mechanism to allow for changing the position quickly while still being stable after movement. It comes with both the clamp attachment that we’re using and a standard tripod screw attachment if your phone or webcam has that connection. You can buy it from Amazon here.
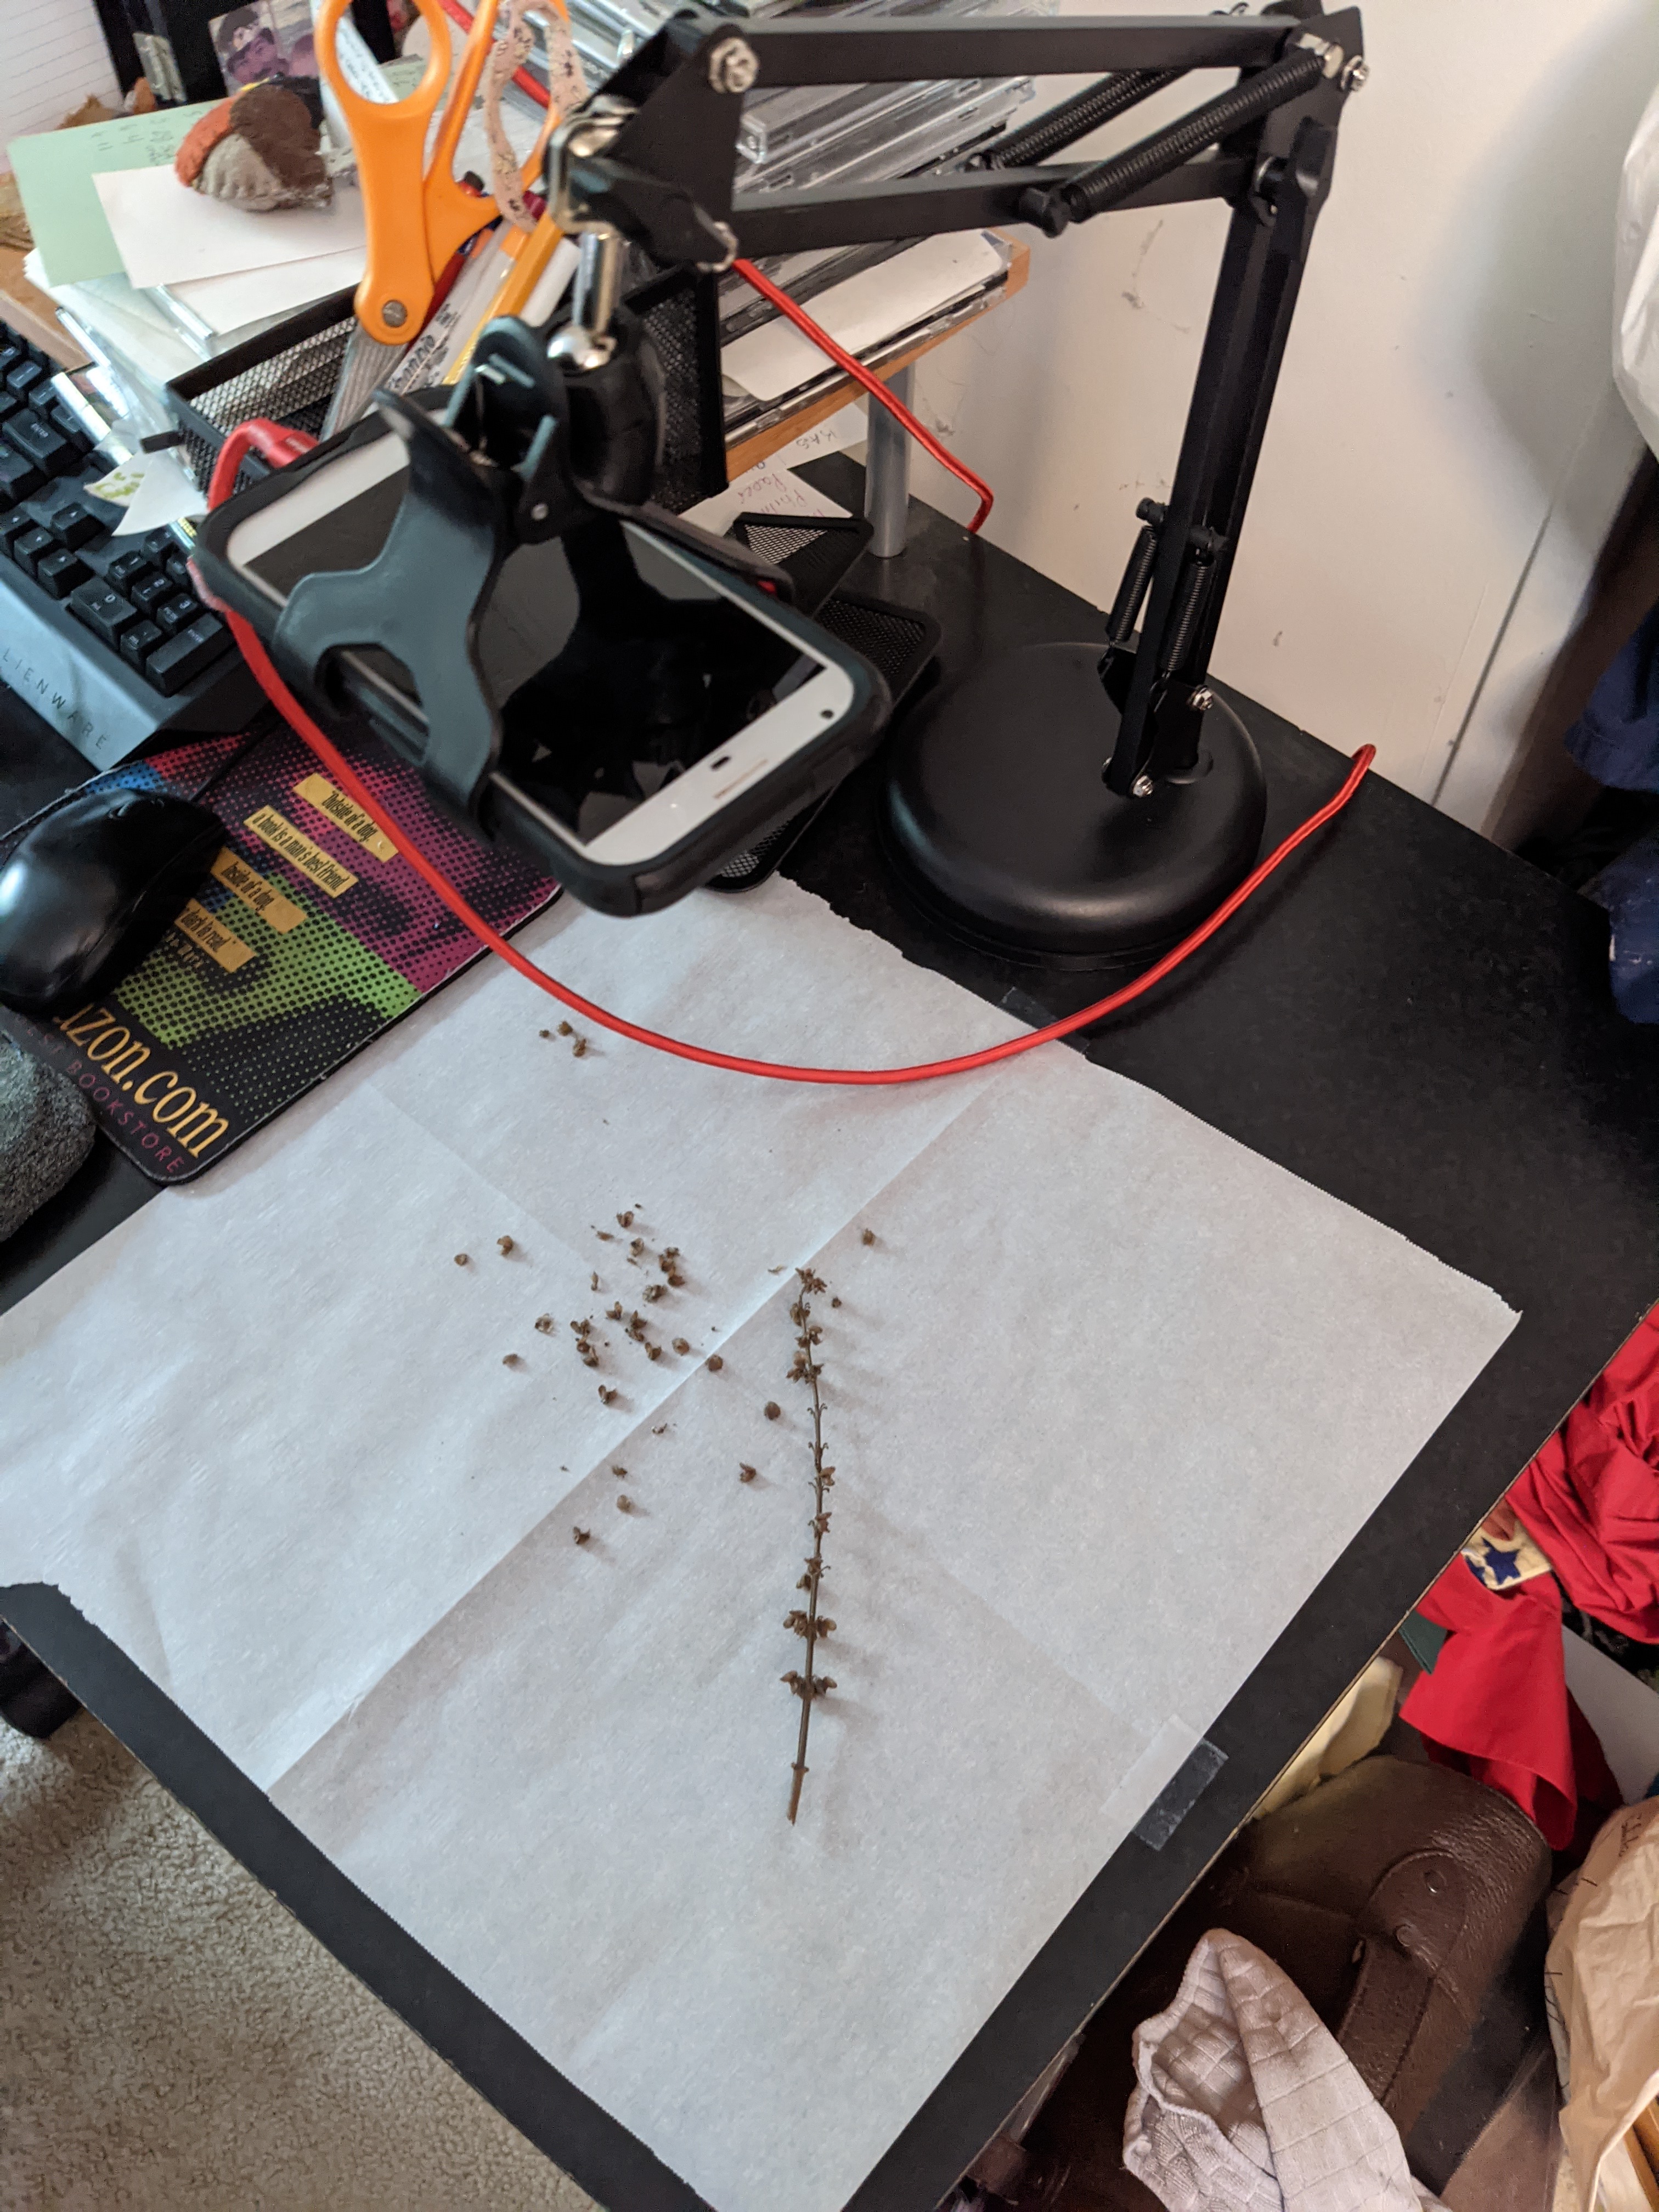
Cell phone focused on a small stage with seeds for a seed collecting talk
Next, you need to run some software on your phone and computer to make it function like a webcam. There are multiple options. We chose to use one called iVCam which is available for both Android phones (here) and iOS phones (here). It gives a great steady picture over wifi. A wired connection is also supported but we haven’t tried it (the red cable is just for power – the retired phone has battery issues). Alas it appears that this program only supports Windows PCs and not Macs. One important tip that confused us for a while: it is easy to configure the software to use the phone’s microphone. This is fine if you are using the phone as your main webcam for participating in a chat. But if, like in our case, it is a secondary camera, you can easily get feedback loops and/or echoes by having two microphones active at one time. For this kind of use, disable the phone’s microphone in the iVCam PC program.
Many other types of cameras can be used in this type of setup. But you’ll need to do your own research into how to connect them to your computer and configure them so that the mixing program (below) can use their output.
Step 2: The (free) Video Mixer
The main secret sauce for this project is a free program called OBS which stands for Open Broadcaster Software. Its home website is https://obsproject.com/ and has versions for Windows, Mac, and Linux. There is also a similar spinoff program called “Streamlabs OBS.” We have not used Streamlabs but it seems to offer better tools for people who regularly stream on Twitch or YouTube. That wasn’t our use case, so we stayed with the original version of the code. Since the two are very closely related, most of the how-to below should work for both programs.
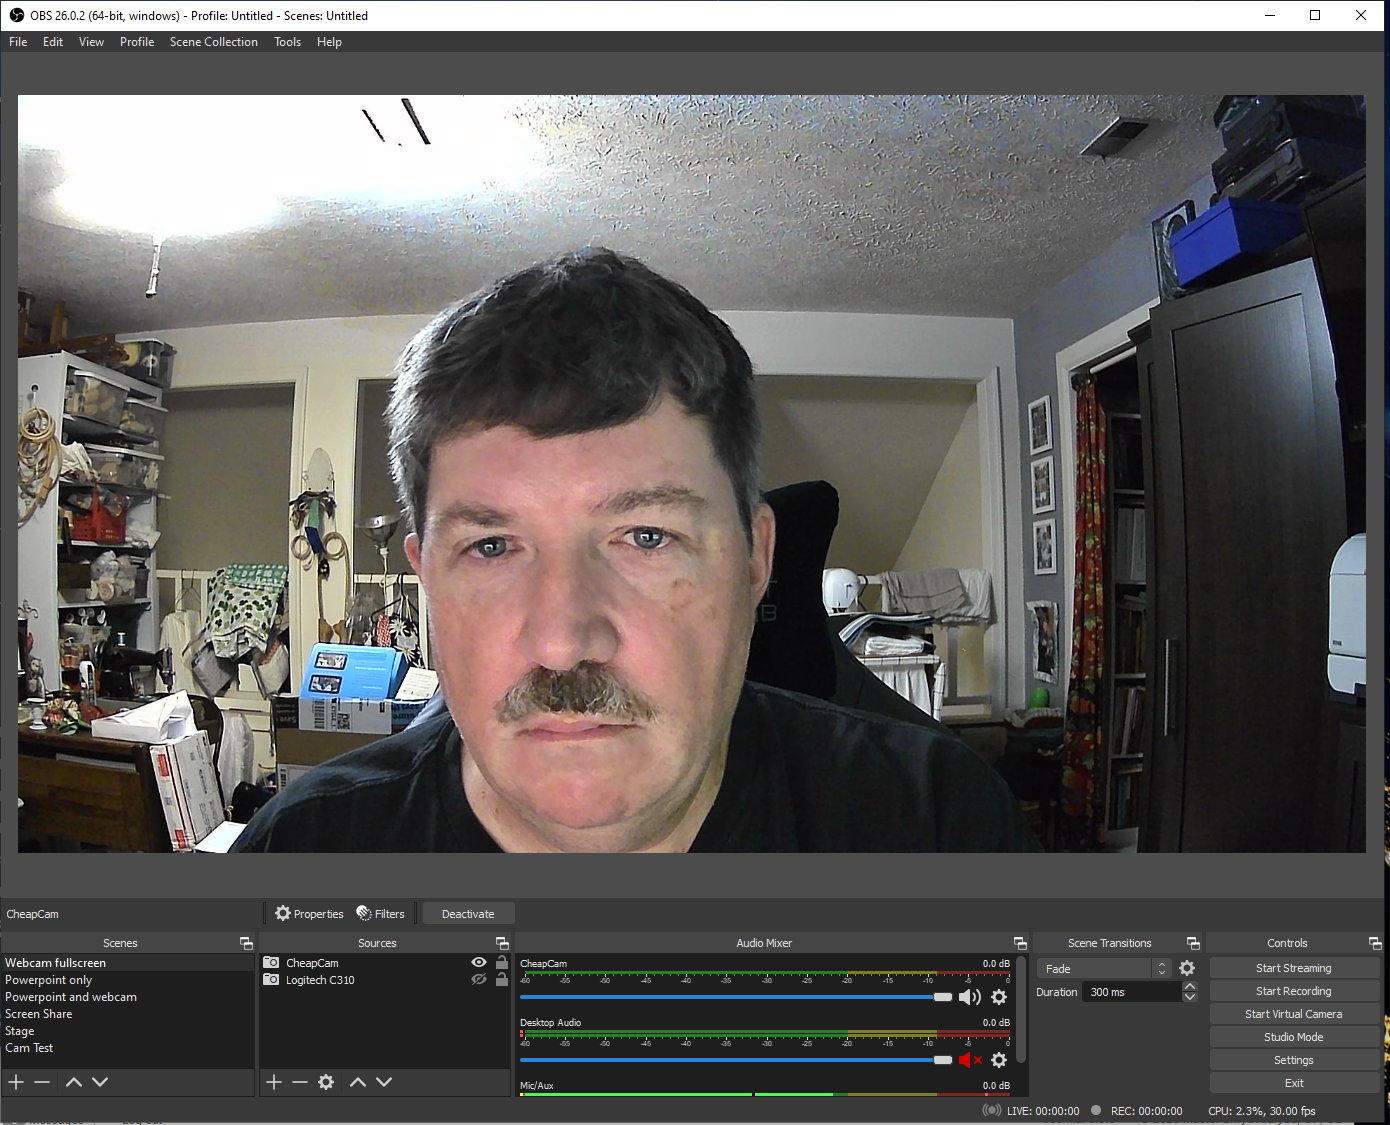
The OBS program interface
OBS basically allows you to access, combine, and switch between all of your video sources:
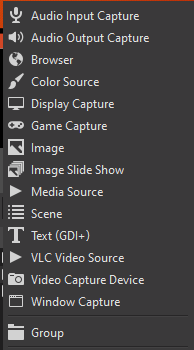
Types of sources OBS supports
To get started, create a scene. A scene is a combination and arrangement of one or more video sources. Go to the scene window (by default at the bottom left of the OBS program) and hit the plus button at the bottom to create a new one. Give it a name like “webcam”, “slides”, or “slides+webcam” that will make it easy for you to choose when switching between them.
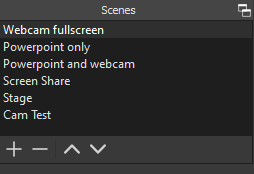
OBS’s scene window with my defined scenes
Next, add some sources to your scene. As shown above, you can choose a lot of options for sources in the source window:
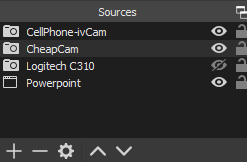
Some OBS sources I’ve defined
Add each source you want to use in this scene. To add a webcam (or a cellphone+software pretending to be a webcam) hit the plus button at the bottom, choose “video capture device”, assign a name like “CheapCam” and then choose which device is actually attached to that name. If you want more than one source in your scene hit the plus button again and add them one by one. Once you’ve defined a source in one scene, you can choose an “existing source” in other scenes to use it again and reduce your setup time. This is strongly recommended since any tweaks you do to the source in one scene (frame rate, color correction, etc.) will carry over to other scenes that use that source.
Create additional scenes as desired. For each scene, you can size and position each source on the screen. The eye icon beside each source can turn it on or off for the scene. For my use, I have scenes for each source (webcam, slides, and cellphone/stage) that I use most of the time and then a couple with overlapping windows that I only use once in a while.


Multiple variations on positioning three source windows with complete, some, or no overlap
Once defined, you can change the active scene by just clicking on its name in the scene window.
Sharing Powerpoint tips: There are a lot of different ways to share your powerpoint slides. If you have a second monitor you can present to it and share the whole screen using the “display capture” source option. But, I prefer to use the “window capture” option. You can get what looks like a full screen by configuring your slide show in powerpoint itself. To do this, select the “Slide Show” menu from the top row, then click on “Set up Slide Show” and choose “Browsed by an individual (window)” option. Then save your presentation. Then, for this presentation, when you tell Powerpoint to present (with F5 or the projector icon at the bottom) you will get a window that behaves well with the rest of the windows on your desktop. Tell OBS to capture that window as a source and you’re good to go. You can even resize the source in your scene so that the top and bottom info that is not part of your slide is cropped off.
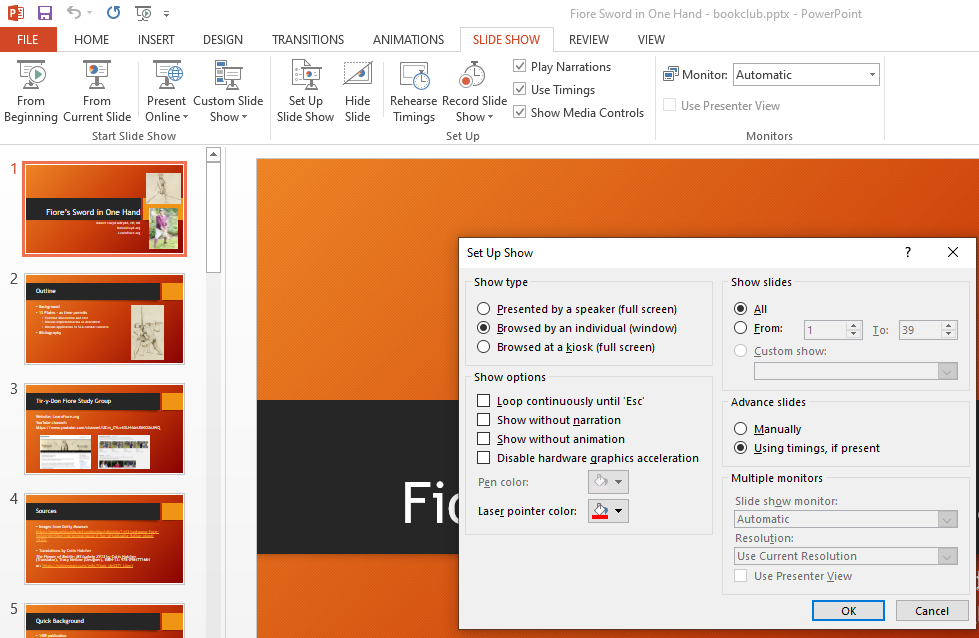
Configuring your Powerpoint presentation to present in a window rather than full screen
Step 3: Sharing your OBS Output
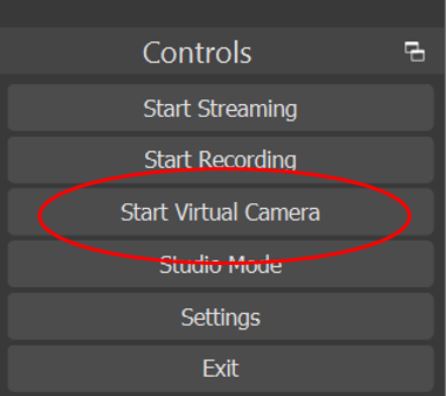
The final step in this process is sharing your output in your virtual meeting software of choice. To do this, look in the lower right “Controls” window and click on “Start Virtual Camera.”
This will create a virtual webcam called “OBS Virtual Camera” that is actually the output (currently selected scene) of OBS. Then go into the settings of your meeting software and tell it to use “OBS Virtual Camera” as your webcam and you are good to go! Note that even when presenting slides your output will be going out as if it were your webcam and you don’t need to activate screen sharing (or go “live” in Discord terminology).
Important Safety Tip: Before sharing your screen, take a look at all the windows you have open and close anything that you do not want to share with the world. Also look at all of the links and icons you have sitting on your desktop, the tabs open in your browser, and even your wallpaper. Things of concern could be financial information, medical information, porn, etc. You may also want to check the area behind you that is visible in your webcam.

Tip #2: If you have your meeting software set to blur your background or show a cool image behind you, this will mess up the OBS sharing. You need to turn off these options while presenting with OBS.
You may also need to tell your meeting software that you’d like to transmit in high resolution. In Google Meet’s Video setting tab, there is a “Send resolution” menu item that you should change from the default of “auto” to “720p”. In Zoom’s Camera setting tab there are several options that I turn on: “HD” on my camera, and in the advanced options “Optimize video quality…”, “Video Processing”, “Receiving Video”, and “Sending video”. I’m not sure exactly what each Zoom option does, but this combination worked for me.
Step 4: Testing
Please spend some time practicing with your setup before using it for an actual class. You may find issues with sound feedback loops, lighting, etc. All are easy to fix if you’re working in advance but really frustrating if you are burning limited class time tracking them down.
Step 5: Optional Bells and Whistles
All of the above ideas can be accomplished for very little if any money if you use gear that you already own. This last section is about a nice to have optional toy that will make operations a little smoother. It is a small box with buttons that interface easily with OBS to allow switching scenes without having to bring up the OBS window and click on a scene choice while you’re talking or presenting.
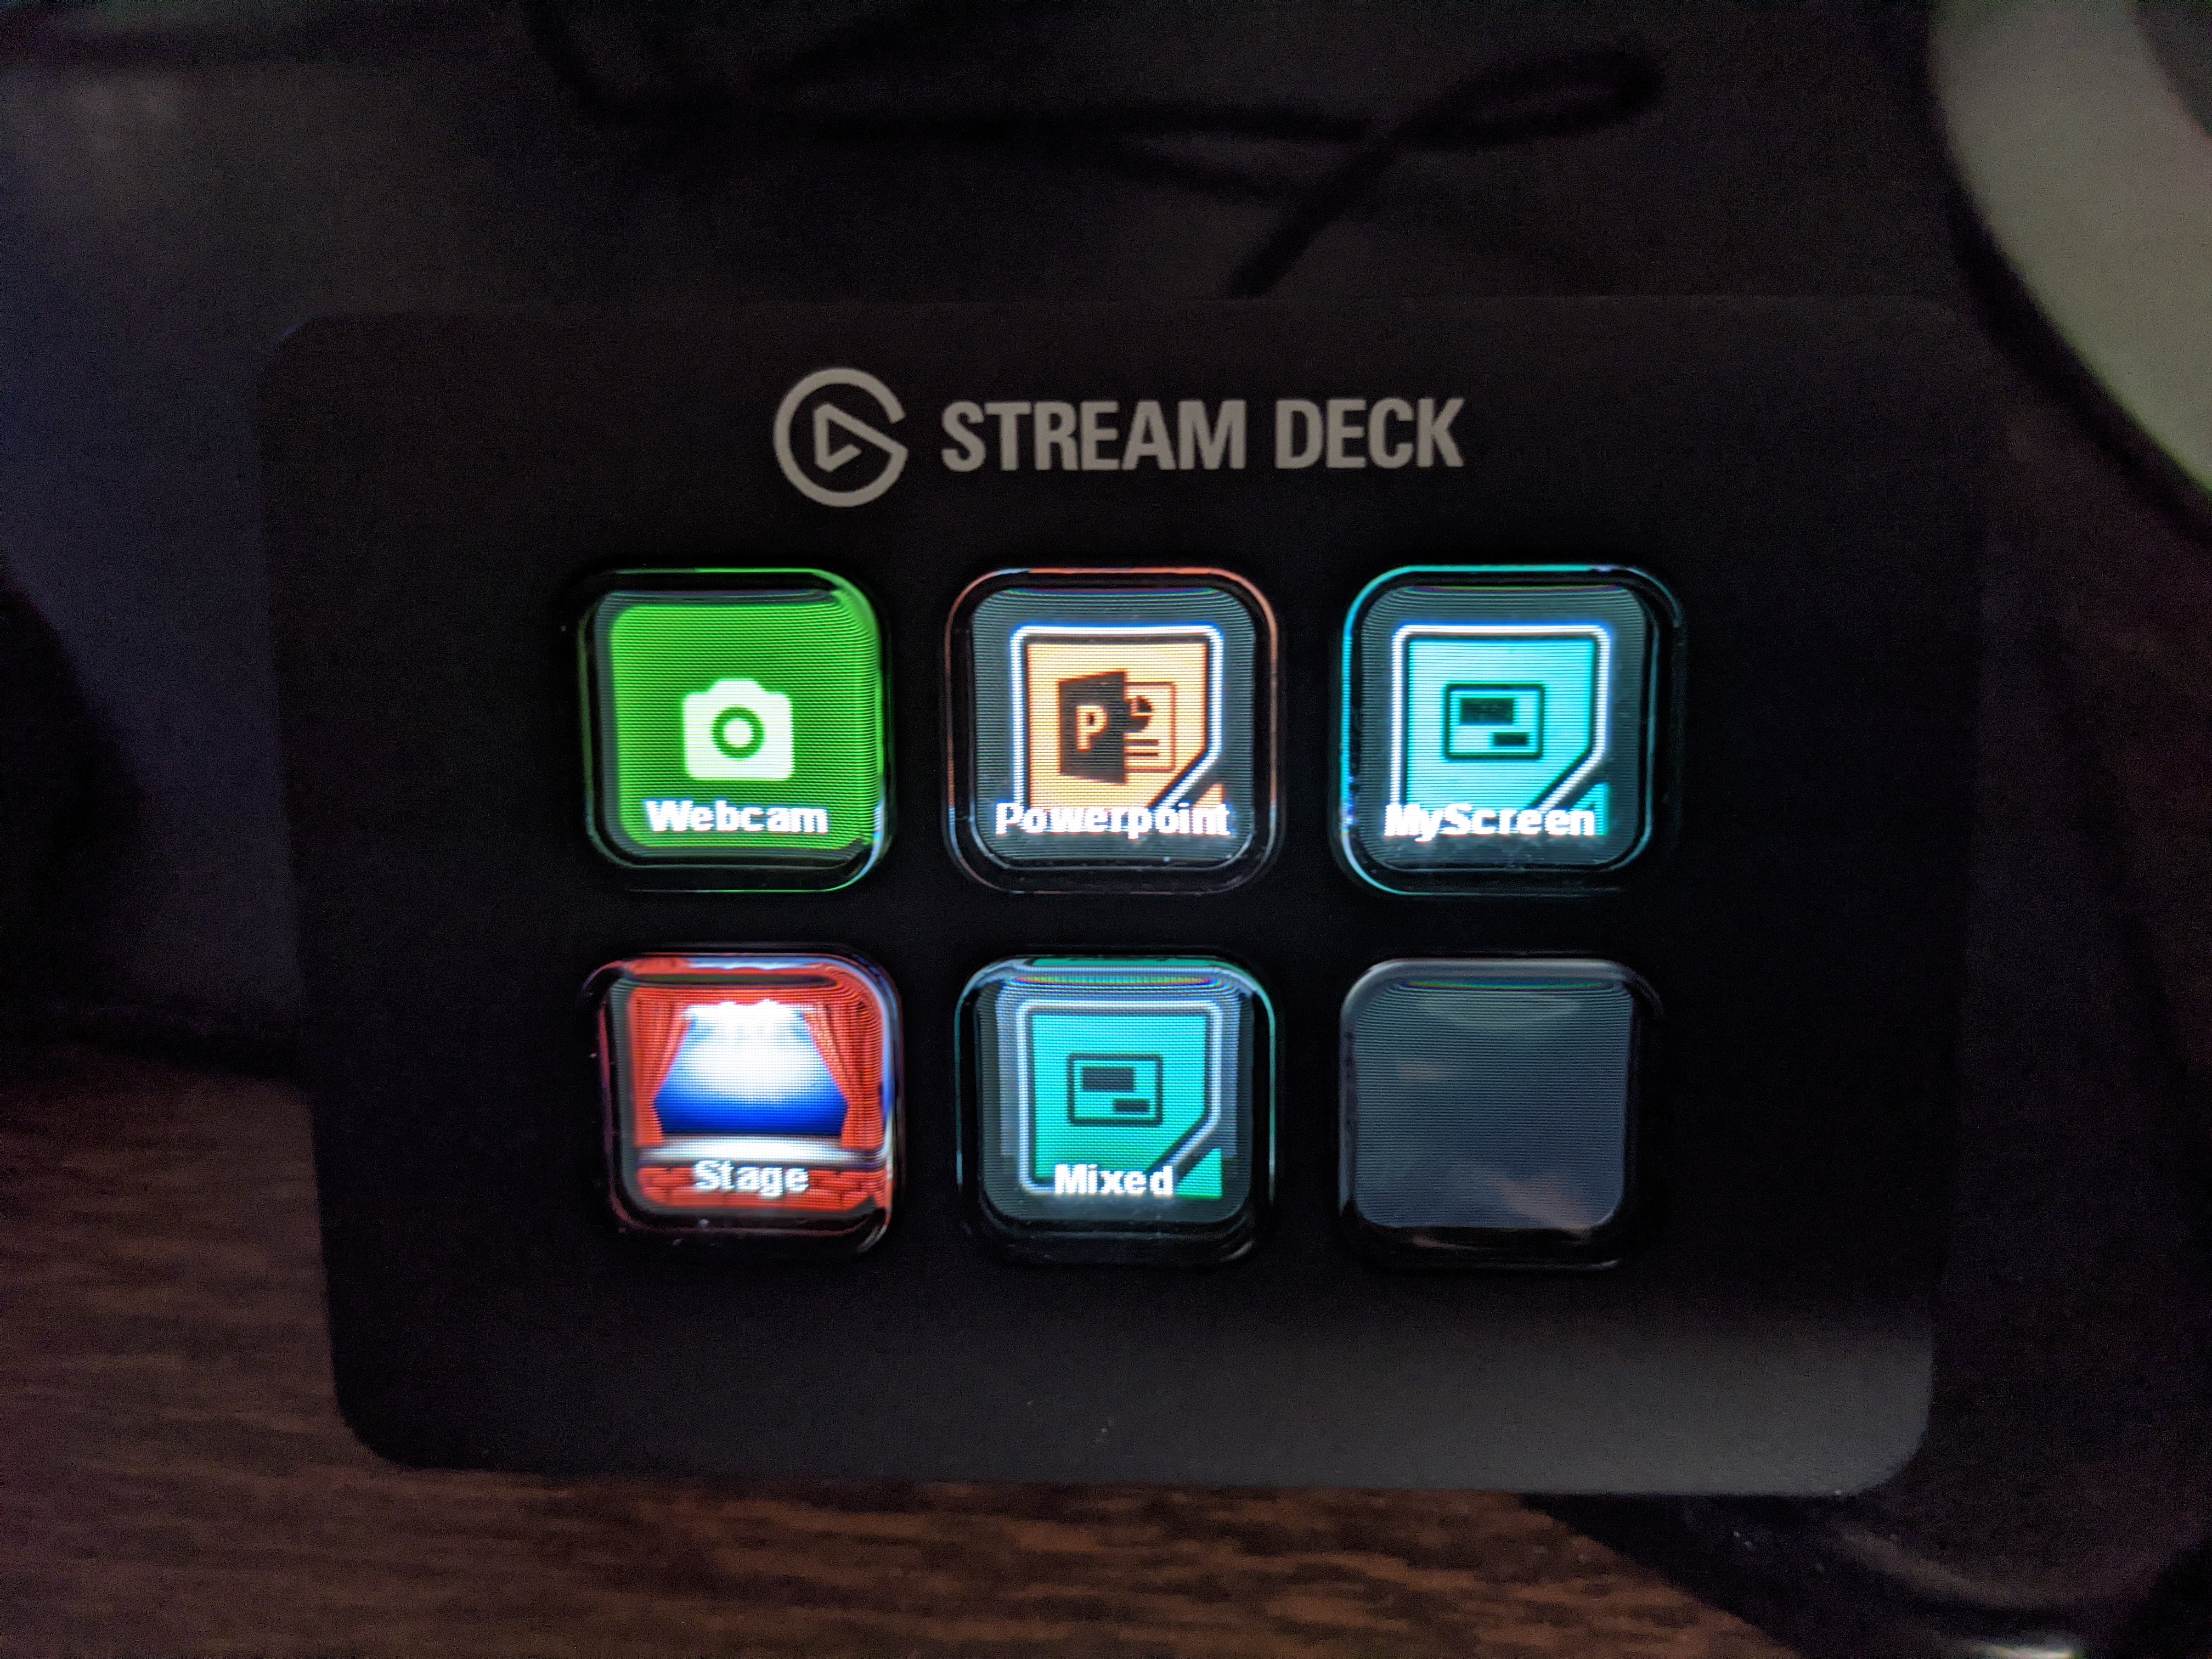
My StreamDeck Mini configured with custom buttons to switch between 5 OBS Scenes
Elgato makes “Stream Deck” button boxes with 6 (the “mini”), 15, or 32 (the “XL”) buttons. The buttons have a color LCD screen behind them that can have a custom image displayed for each button. It interfaces directly with OBS straight out of the box:
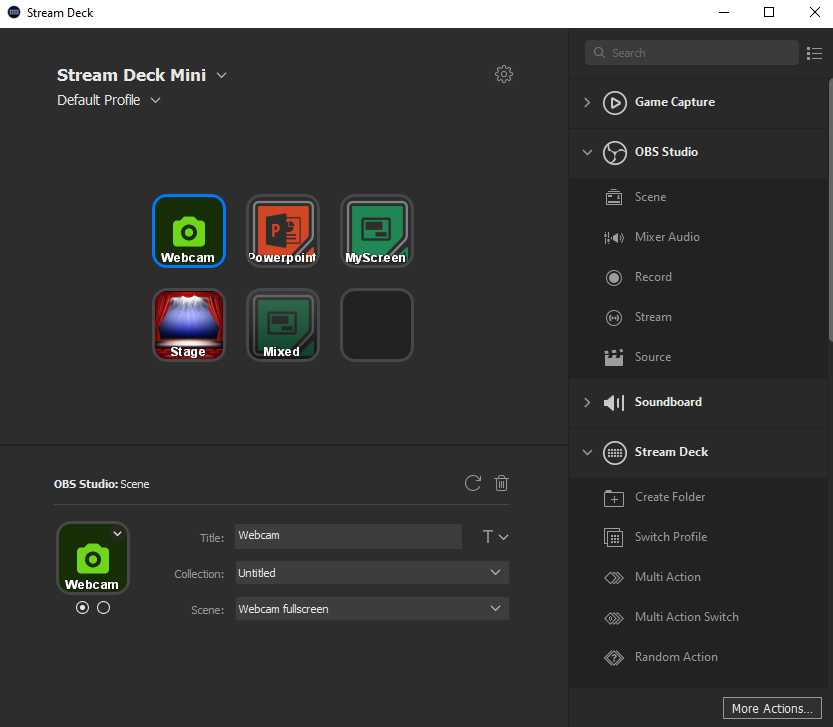
Stream Deck’s software makes dragging and dropping OBS scene changes extremely easy
Your stream deck buttons can also be used to toggle sources on and off within a scene. This can be used to turn your picture-in-picture overlay on and off or to toggle a chryon/lower-third overlay like this one. The overlay is an image created in a painting program (I used Photoshop) where most of the image (the upper 75%-ish) is transparent. Note that for this demonstration I did not pay appropriate attention to video safe areas which probably don’t matter for a computer window medium like Zoom/Meet/Discord but are important if the video is going to be viewed on a television.

Stream Deck buttons can also be configured for things like PhotoShop or Premier and are widely used by power Twitch and YouTube streamers. Currently the three models cost $100 (6 buttons), $150 (15 buttons), and $250 (32 buttons) on Amazon. As I update this article, the 6 button box is on sale for $80 (20% off) and they have added several new variations on the base design. The 6 button box is also sold at a variety of other retailers and has shown in stock at one of my local Target stores if you are interested in walking into a store, paying at a cash register, and walking out with your box.
Collected Links
Here are all the products I mentioned in the article. All Amazon links are affiliate links where I get a small cut of your purchase back as Amazon credit:
- No-name webcam
- Wider view webcam
- Movable camera mount
- ivCam cellphone to webcam software
- OBS Software
- Stream Deck buttons: 6 buttons, 15 buttons, 32 buttons, several new variations