Saving your Family Memories
Introduction
My parents have a large collection of 50-ish year old 35mm slides. The collection starts before their wedding and runs through my youngest sister’s birth – a range of more than 20 years. They wanted to go through, sort the pictures, and save the good ones. But they discovered that their old Argus slide projector didn’t work any more. Most of the slides were stored on long straight trays (not the more common carousel style). With some Ebay purchases and some part swapping they were able to get a mostly working projector. But, the effort involved really illustrated that we needed to digitize the pictures while hardware to scan them was still available. And while my parents were still around to help caption the photos.
I also had a fairly large collection of 35mm negatives from my college years and from trips while I was dating my (now) wife. I had scanned some of the prints on a flatbed scanner but was not satisfied with the results.
All of these were very precious to me and it was important that I save them. So, I set about researching options. I hope this article will help you to research options to safely archive your family’s memories.
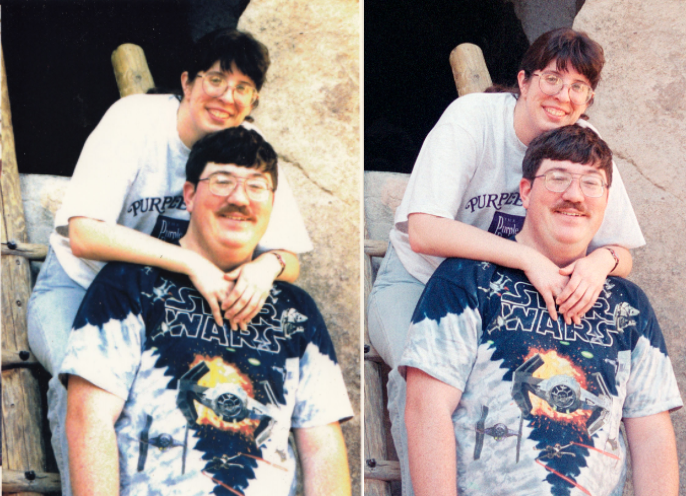
The same picture scanned from a print on a flatbed (left) and the negative with the new scanner (right). Cropping is slightly different, but the detail and color is much better from the negative.
My Goals
- Digitally scan the slides and negatives at high resolution
- Save the images in a format that is likely to be viewable in 50 more years
- Save the images on media that is likely to be readable in 50 more years
- Caption the images
- Share the images with every family member who didn’t run fast enough to avoid having a copy placed in their hands
Not a simple set of goals!
There are lots of commercial options where you box up your slides/negatives/etc. and drop them in the mail to have someone else do the work. That could meet some of my goals, but given the shear volume of material and its importance to me, I did not seriously consider any of them; I did not want to take the chance that everything could get lost. For me, these pictures are unique and irreplaceable. No amount of insurance could make up for their loss.
Goal 1: Scanning
I had previously used a flatbed scanner to scan prints, and with a special additional gadget, slides and negatives. I was not satisfied with the results. So, I set to researching dedicated 35mm scanners.
I started with an Amazon Search. I discovered that there were a lot of options. I started reading features and reviews. The sub $100 options all seemed to be not up to the job. They produced low resolution images and were hard or impossible to adjust. There were options that cost more than $1000 and automatically fed the slides through. Nice, but too pricey for me. I also looked at products at dedicated photo stores like B&H (search for film scanners).
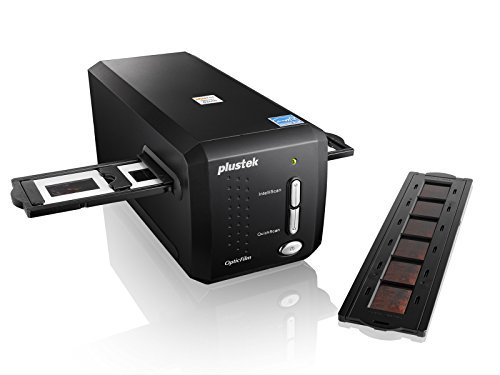
There were several options in the $250 to $500 range that I decided to focus on. I googled for reviews of promising models and eventually chose the OpticFilm 8200i SE Film Scanner for $350. It supported both slides and negatives and included an infrared mode that would identify and correct dust and scratches on the picture which I expect to be issues with decades old film. I also bought one extra slide and one extra negative holder to make my scanning work flow smoother – I could load one while the other was in the machine.
I am very happy with the results! The infrared dust/scratch detection worked very well and the scanner produced amazing results. Many of the 50 year old slides were underexposed when projected on a screen but I was able to adjust the exposure and color balance of the pictures as they were scanned to produce a much improved result.
With the scanner set to maximum resolution with multiple scanning passes, it took about 10 minutes per slide or negative. I set up the scanner with my laptop beside me while I worked on other projects. I could hear the scanner finish its scan, set down my project, check the results and move to the next slide fairly efficiently. Scanning a couple thousand shots took a few months, but did not seem like a horrible chore to me. I really enjoyed the thrill of seeing both new and familiar pictures of myself, my siblings, my parents, my college friends, and my wife.
Some of the slides had a significant amount of mold on them that the infrared pass was insufficient to deal with. They had to be cleaned. I experimented with a q-tip wetted in water on a non-critical slide and damaged the slide. A little research found that Kodak recommends Isopropyl alcohol in a concentration of 98% or greater. This can be a little hard to find. Two local drug stores didn’t have it and I ended up ordering mine from Amazon. That did the trick!

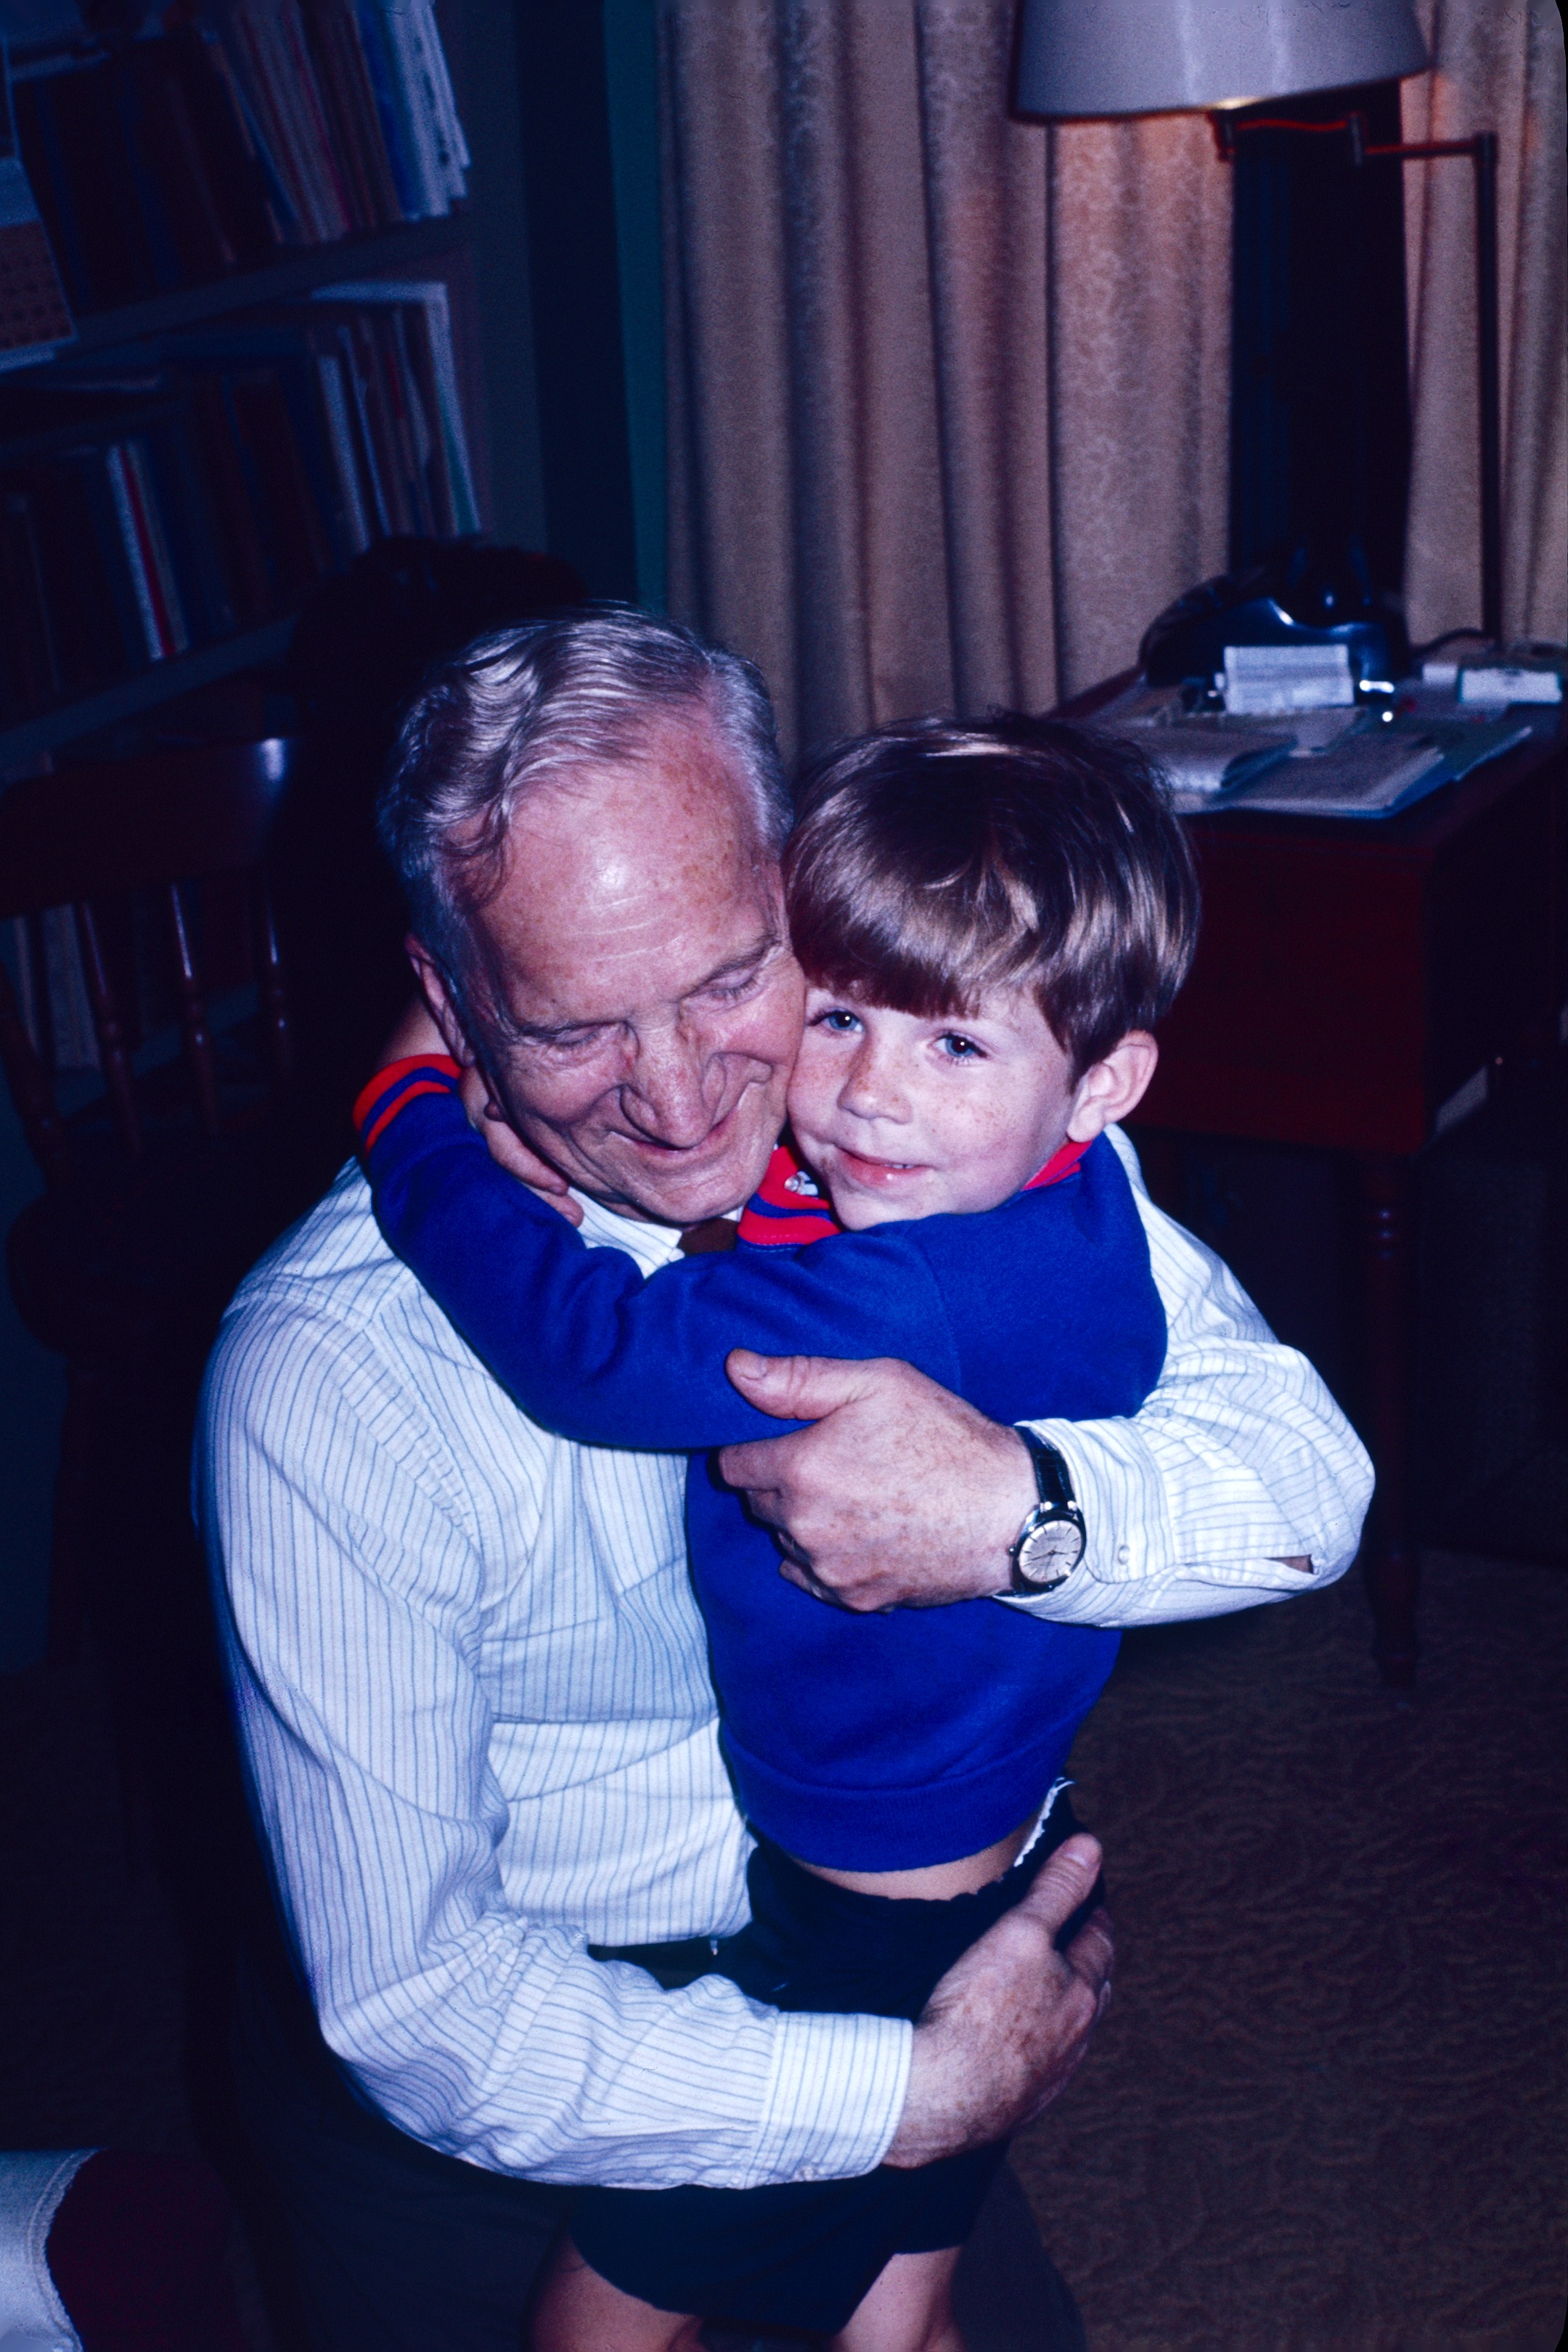
The black mold in this picture is on the slide itself. The software did a great job of reducing it, but did not completely eliminate it. Still this is a 50 year old picture, it looks great, and a little photoshopping could easily finish cleaning up the shot.
After scanning, I returned the slides to their trays and boxes and returned them to my parents. The negatives had been stored with the prints just as they came from the photo developer. I separated the prints from the negatives, organized them, and stored the prints in boxes and the negatives in a notebook with archival plastic storage sheets.
Goal 2: High Quality Picture Format viewable in 50 years
There are scores of digital image formats that pictures can be saved in. Assuming my grandchild has a copy of the file (see goal 3 on storage media) in 50 years, will their computer/phone/media device be able to actually open and display the picture?
NASA has thousands of pictures from scores of missions stored on obsolete and/or proprietary computer and video tape formats that they may or may not have any machines capable of reading and no programs capable of understanding once read. A few people successfully recover these shots from time to time, but the vast majority may be lost forever. One cool set that a friend of mine helped save contains a lot of very detailed closeups of the Space Shuttle during launch. Use the link to take a look. You can even download and burn yourself a copy of the DVD!
So, if NASA has a problem with losing images due to obsolescence, how can I avoid that problem?
Obviously, any prediction of 50-year-from-now technology is a guess. My assumption was that the more currently ubiquitous (meaning something found everywhere) the format the more likely future software would still be able to read/convert it. Today, the most common file formats are GIF and JPEG. A second tier includes TIFF and PNG. Beyond those four formats, my guess as to the likelihood of long term support drops quickly. Camera RAW images and other specialty formats may still be supported by some future software, but that support may be uncommon.
TIFF has the unique feature of the four of being lossless. All of the other formats throw away some of the picture data to achieve smaller files. So, I started with scanning to TIFF files. But, I quickly decided that the file sizes were too large at the high resolution I was using for scanning. Each picture was about 21mb in size for a 3328×2216 pixel scan. I knew I had a large number of pictures to scan (eventually over 2000 with probably more to come) so size was going to be an issue.
So, I moved to and stuck with JPEG. It is currently the most commonly used image file format. I cannot envision any near future image viewing software that will not support it. And I was comfortable with the quality of the compressed lossy images. The size of these files varied but averaged at about 1.5 mb for the same resolution.
Goal 3: Storage Media that is readable in 50 years
50 years ago, 35mm slides were the state of the consumer art. Today they are difficult but not impossible to project due to aging and uncommon equipment. 50 year old computer tapes are very difficult to get read. More recent computer media like 8-inch, 5-inch, and 3.5 inch floppy discs are fairly difficult to read on current computers and many new computers are even coming without an optical CD-ROM or DVD drive. These formerly state-of-the-art formats didn’t survive anywhere near my 50 year goal. The current USB flash drives may well suffer a similar fate.
“Store it in the Cloud,” I hear you say. Great, but there are still concerns! Many photo and other cloud storage services have already gone out of business. Which ones are still going to be around in 50 years? Both Amazon and Google offer free, compressed, photo storage which is great. Is it worth it to pay for more space to store uncompressed images? I was happy enough with the free options that I did not research paid storage options.
For me, I chose pretty close to “all of the above”. I made data DVDs and USB sticks with the pictures to give to family. I also used the free Google Photos and Amazon Prime storage to cloud save my scans. I gave links to the digital albums to my family. And at home I have the pictures stored on multiple drives and burned onto two sets of BluRay ROM discs. One set gets stored in a binder that gets grabbed if at all possible if we evacuate for a hurricane or fire and another set gets stored in my file cabinet at work. As new storage technology comes out I will also make copies on the new media.
Some of these will inevitably fail to meet my 50 year goal, but by choosing all of them I am hopeful that the pictures will make it and be viewable long into the future.
Goal 4: Captioning
Pictures are a lot more meaningful if you know who the people are, when it was taken, and what they were doing. Prints can have writing on their backs. Slides can have notes written on the cardboard holder. Many prints and slides will have either the date the lab developed/printed them or in some cases during the LED era the date will appear in red numbers on the photo itself.
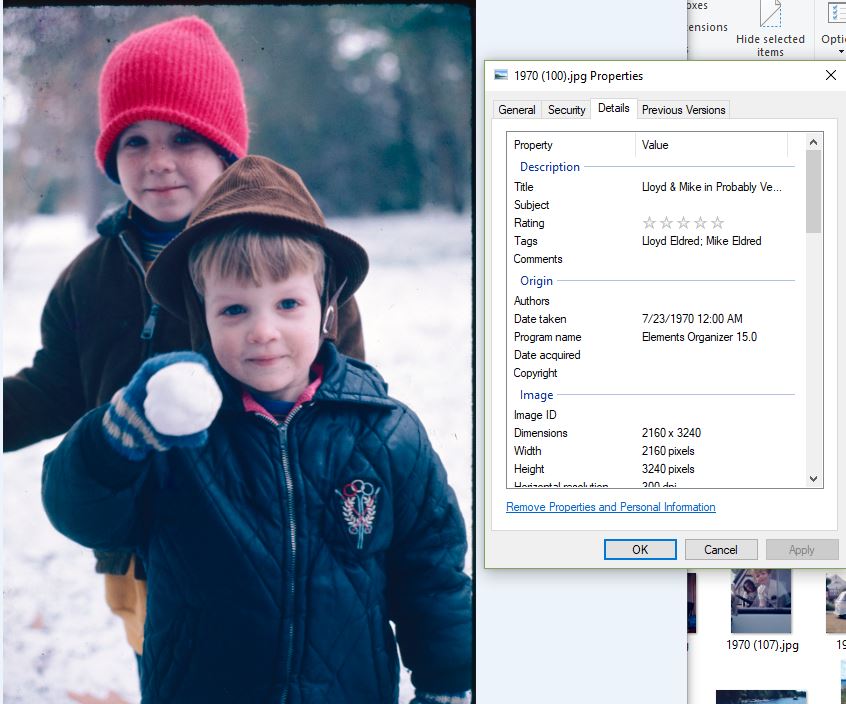
How do we do something similar with a digital file? A separate text or PDF file is a possibility that would also probably be readable in 50 years. But such a file could get separated from the image. A better solution is to store the caption in the file itself. Most digital file formats, including my choice of JPEG, support something called EXIF or metadata. This allows the file to contain the date and time it was taken, the camera model used, the shutter speed/aperture/ISO camera settings, and much more. Captions are also supported. Much of the time this information is hidden from you, but most viewing software will allow you to see it if you look in the right place. For instance, right clicking on a picture in Windows and selecting Properties and then Details will show the stored metadata (you can edit it in this window too).
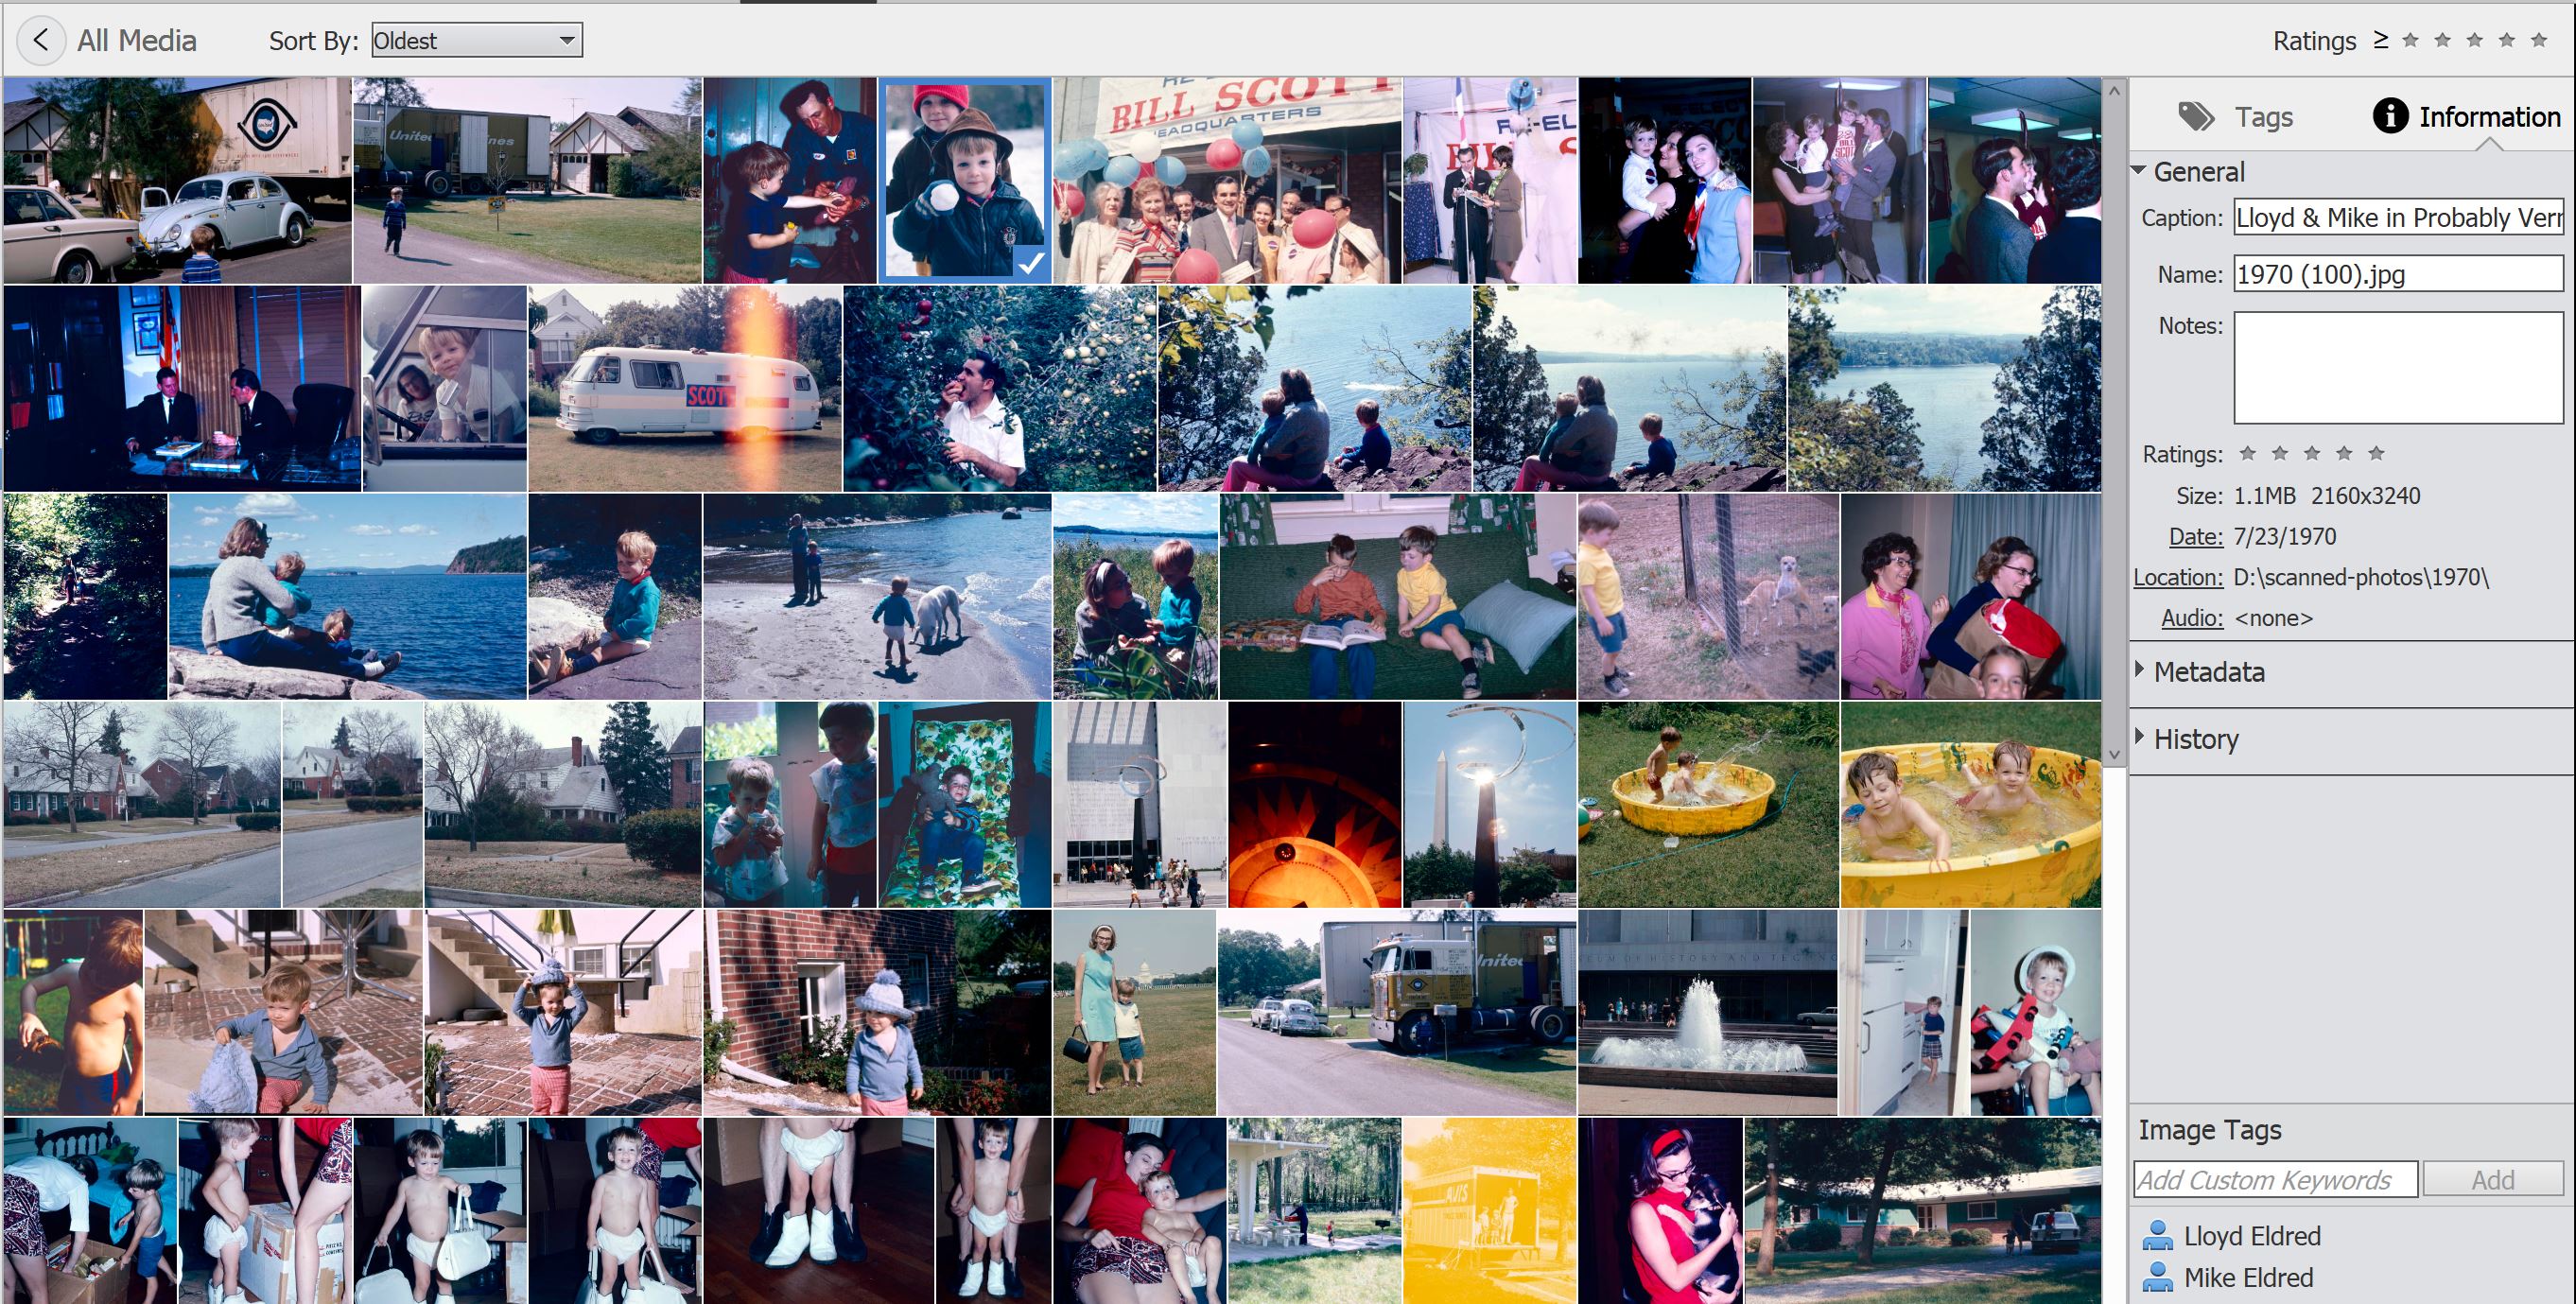
I wanted to be able to sit down with my parents, have a slide show, and quickly capture their memories of the people’s names and when and what the event in the picture was. So, I did a lot of looking at image editing software. I already owned Adobe’s Photoshop and Lightroom* as well as several other cataloging and editing tools (Breeze Browser Pro was also considered). I wasn’t happy with any of them for this purpose. I ended up buying Adobe Photoshop Elements. Its organizer tool allowed me to do Facebook-like tagging of people and to create descriptive captions quickly while doing a family slideshow. It also allowed me to change the pictures’ creation dates individually or in a group. The scanning software had created that field and stored the date I scanned the picture. Elements allowed me to change the date to my guess of approximately when the picture was really taken. I could even do a batch date change of a bunch of pictures to 1971 if I wanted to. It is important to know that a separate step is required in Photoshop Elements to actually write the modified EXIF data back out to the image file. Otherwise the changes are saved in Elements’ own database but not in the picture itself.
*I use older versions of Adobe’s software that I paid for once rather than using the current ongoing subscription versions.
Be aware, however, that some other tools can strip this metadata from the files. I experimented with uploading and then downloading a picture from multiple cloud options to see if my captioning would survive. Sometimes it did not. Facebook, for instance, removed some of the data that it was not interested in.
If you want to do some “all of the above” on the captioning, there are many tools that will generate text or PDF “proof sheets” of a directory of pictures with the filename and any EXIF fields that you choose. This approach could be used to make a separate file with your captions.
Will future picture viewing software allow the user to access this stored metadata in a convenient way? I hope so.
Goal 5: Sharing with Family
As I discussed in Goal 3, I have shared the pictures with every family member that I can. I made copies on DVD and on a USB stick for each set of adults – my parents and my siblings and their spouses. My uncles and cousins all got links to Google photo albums with the pictures.
Around this time we also had a need for a portable projector to do presentations with. We chose this Viewsonic model and have also used it for family slide shows with the newly scanned pictures.
Conclusions
So far, I’ve scanned almost 2500 slides and negatives and have been very happy with the process and finished products.
I did most of my research and decision making in early 2017. Technology continues to change at a very rapid pace. New choices will appear and old options will disappear. I wish you luck in archiving your important family memories so they can be enjoyed for decades to come.
